
Different Shifts Interface
Driver Shifts Interface
Lets start out by navigating to the Driver Shifts Interface, it is located on the left side navigation bar as shown below.
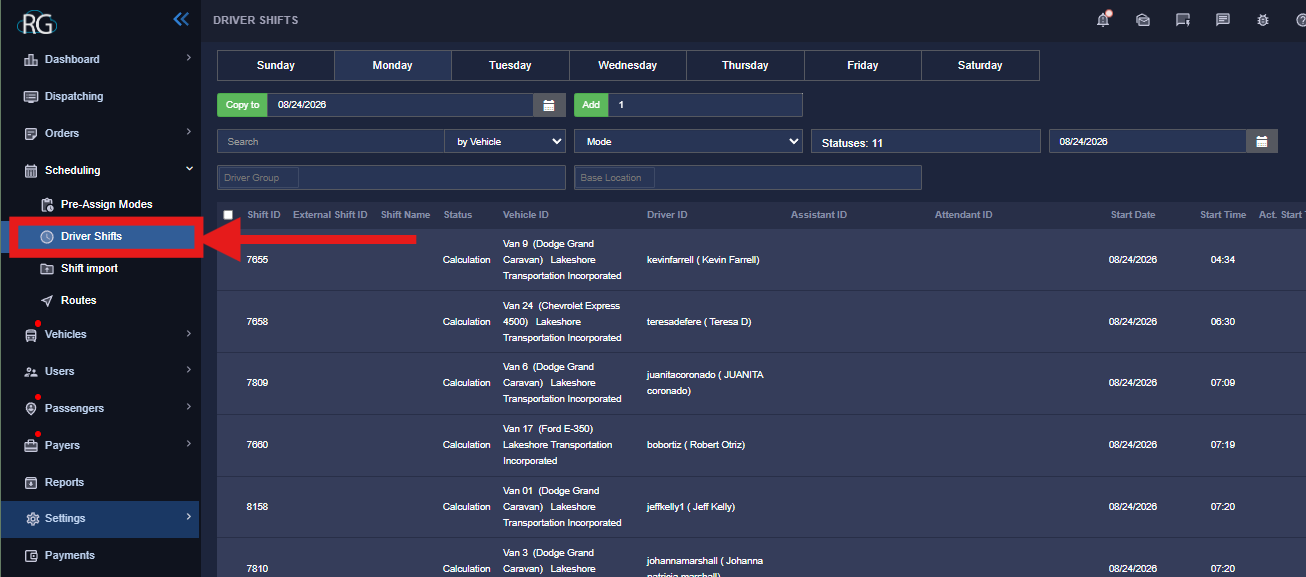
This interface is a little bit deceiving because while you can set your driver shifts here as well as their vehicles it is not the way you want to do it. Think of this interface as a place to manage your driver shifts once they have been set in a pre assign.
In fact setting driver shifts ahead of schedule on this interface will cause problems when we apply the templates, for the templates to be applied best they must start from a blank day with no drivers or vehicles assigned.
Editing Driver Shifts and Vehicles
The best use of this interface is to simply edit the schedule, drivers, and vehicles. You will notice as you assign drivers and vehicles in a pre-assign a driver schedule will automatically be built for you here in the driver shifts interface and you can come here and make edits and changes even on the day of.
Changing Vehicles and Drivers
One of the easiest ways to change a vehicle or driver, especially if it is the day of the schedule, is to just pop in here and do it.
Changing Vehicle
Keep in mind to do it this way the vehicle you want must be unassigned
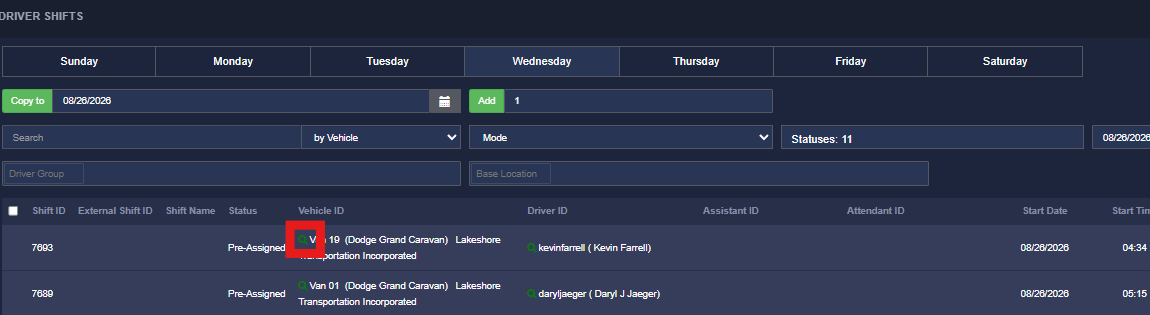
To change out a Vehicle simply go to the driver shifts interface, make sure you are on the correct day and then simply click on the green magnifying glass shown below in the red square.
You can then start typing in the vehicle you would like to swap for, keep in mind you must select it from the pop up list for the change to occur, simply typing the name will not work.
Changing Driver
Keep in mind that if trips are assigned to a driver swapping them around may result in trips becoming unassigned
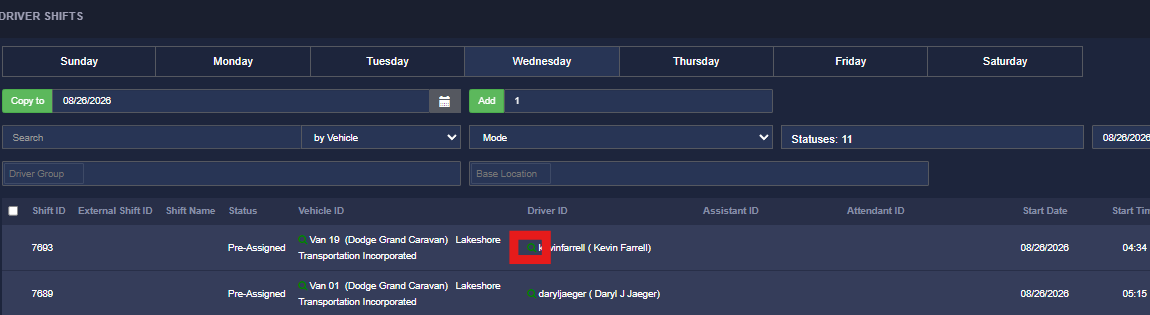
This is extremely similar, your simply just going to select the green magnifying glass next to the driver name instead (shown below).
All other steps are exactly the same. It is important to note that trips will not move around with the driver and this is best done with drivers who are unassigned already.
As you become more and more experienced you will discover little tricks when it comes to moving around drivers vehicles and their trips but these tricks or best taken advantage of in other interfaces like the dispatching screen and pre assign mode, while they can be effective in the Driver Shift interface it is much much more finicky and it should really only be used for scheduling and not shortcuts to re assign trips.
If you dont know what I mean by shortcuts yet, dont worry, you will discover it in time
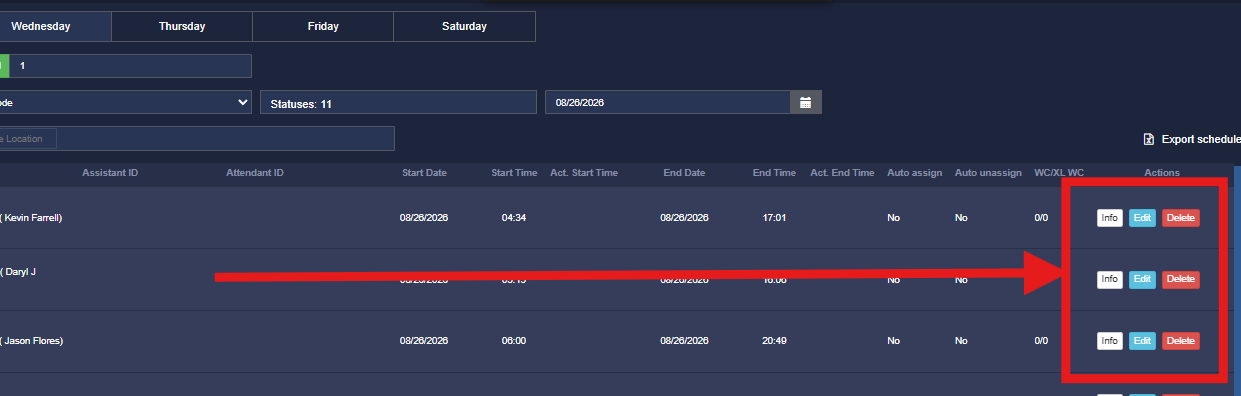
Managing a Driver Shift

Info
Will open up an extended view of the driver shift allowing you to see historical information, assigned orders, shift information, etc.
Edit
Clicking on Edit will open up the driver shift to changes, once clicked you will see all fields that are available for change become indicated as so on the left. What is available for change will often depend on where the pre assign is in its process. A green save button will also appear amongst the buttons, if you make any changes you must remember to select it.
Delete
It is what it says. Delete the shift. This can really come in handy when duplicate shifts are accidentally created which surprisingly happens much more than you would think.
Driver Shift Status
Another important thing to understand about this interface is the status, while it is pretty straightforward its important to know what it means.
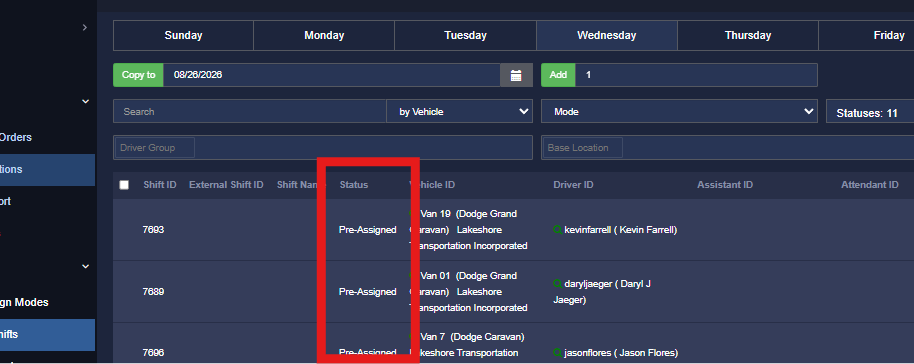
The two main ones you will see here are Pre-Assigned and In Calculation.
Pre-Assigned
The normal state for a driver shift that has been scheduled. This is the status that should show after the pre assign it was created in has been optimized and closed.
In Calculation
When a shift is still "in calculation" it means the pre assign is still being worked on ... when a driver shift is in this state you can not edit or make any changes in the driver shift interface.
Closed
The shift has reached its end time and is over.
Manual exit (or entry)
The driver (or admin) manually started or ended the shift outside of the scheduled time, this may also display if there was never a shift created and the driver is just logged in randomly.
Overdue
The driver started their shift late.
Creating Driver Shifts and Further Options
The last thing I am going to show you here in this interface is the cluster at the top of the page.

There is a lot going on here but we are simply going to ignore it all because we do not utilize any of it at Lakeshore. This is all used for creating driver shifts and cloning schedules but there is no point in bogging your mind down with it because we simply do not use this part of the system. We schedule shifts using templates in the pre assign, if we need to create an extra shift we create it in the pre assign or in dispatching if it is the day of.
Why Dont We Use This?
Well there are a lot of reasons but the biggest one is that we use templates. Scheduling drivers shifts this way does not work well with templates, not to mention it is simply not needed as the template will create the driver shifts for us automatically (with some human help). We did try scheduling using driver shifts instead of templates at one point which was just ultimately much more work and we also tried combining templates and driver shifts but that created more problems than anything. That being said we simply create our shifts in the pre assign.
Changing the day
The one thing you will use up here is the day selector and the calendar drop down.

These two options shown above will allow you to change the day and date of the schedule that is being shown and it is more or less self explanatory. The days select the day you want to show, if you need to go further out (or back) simply use the calendar drop down to select a further date.