
Navigating RG
Welcome
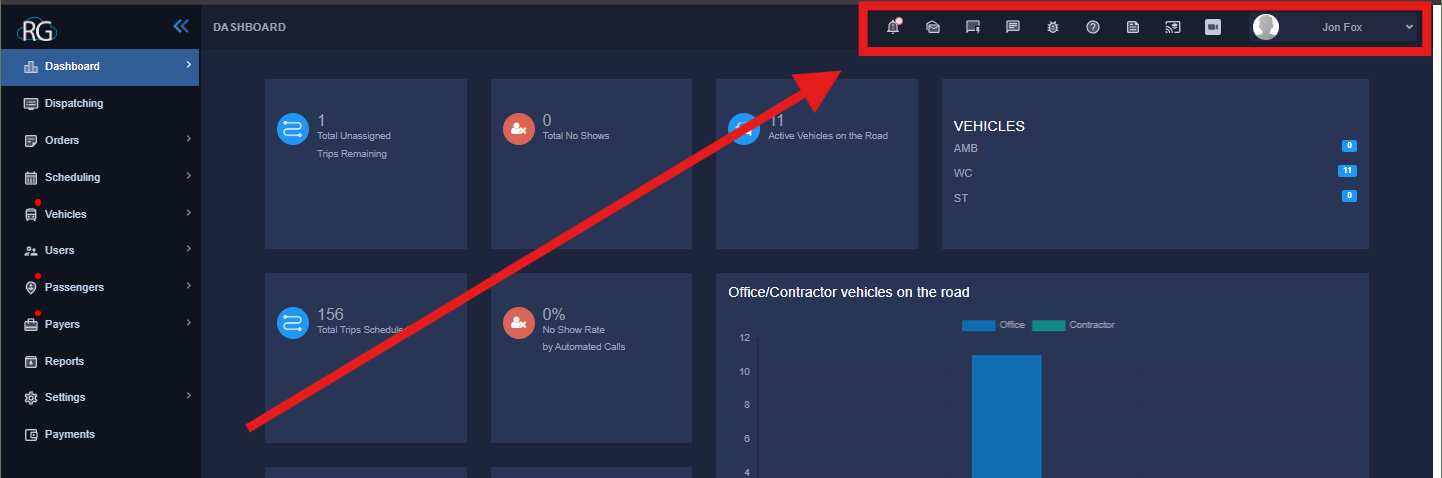
When you first log in to RouteGenie this is what you will see more or less:
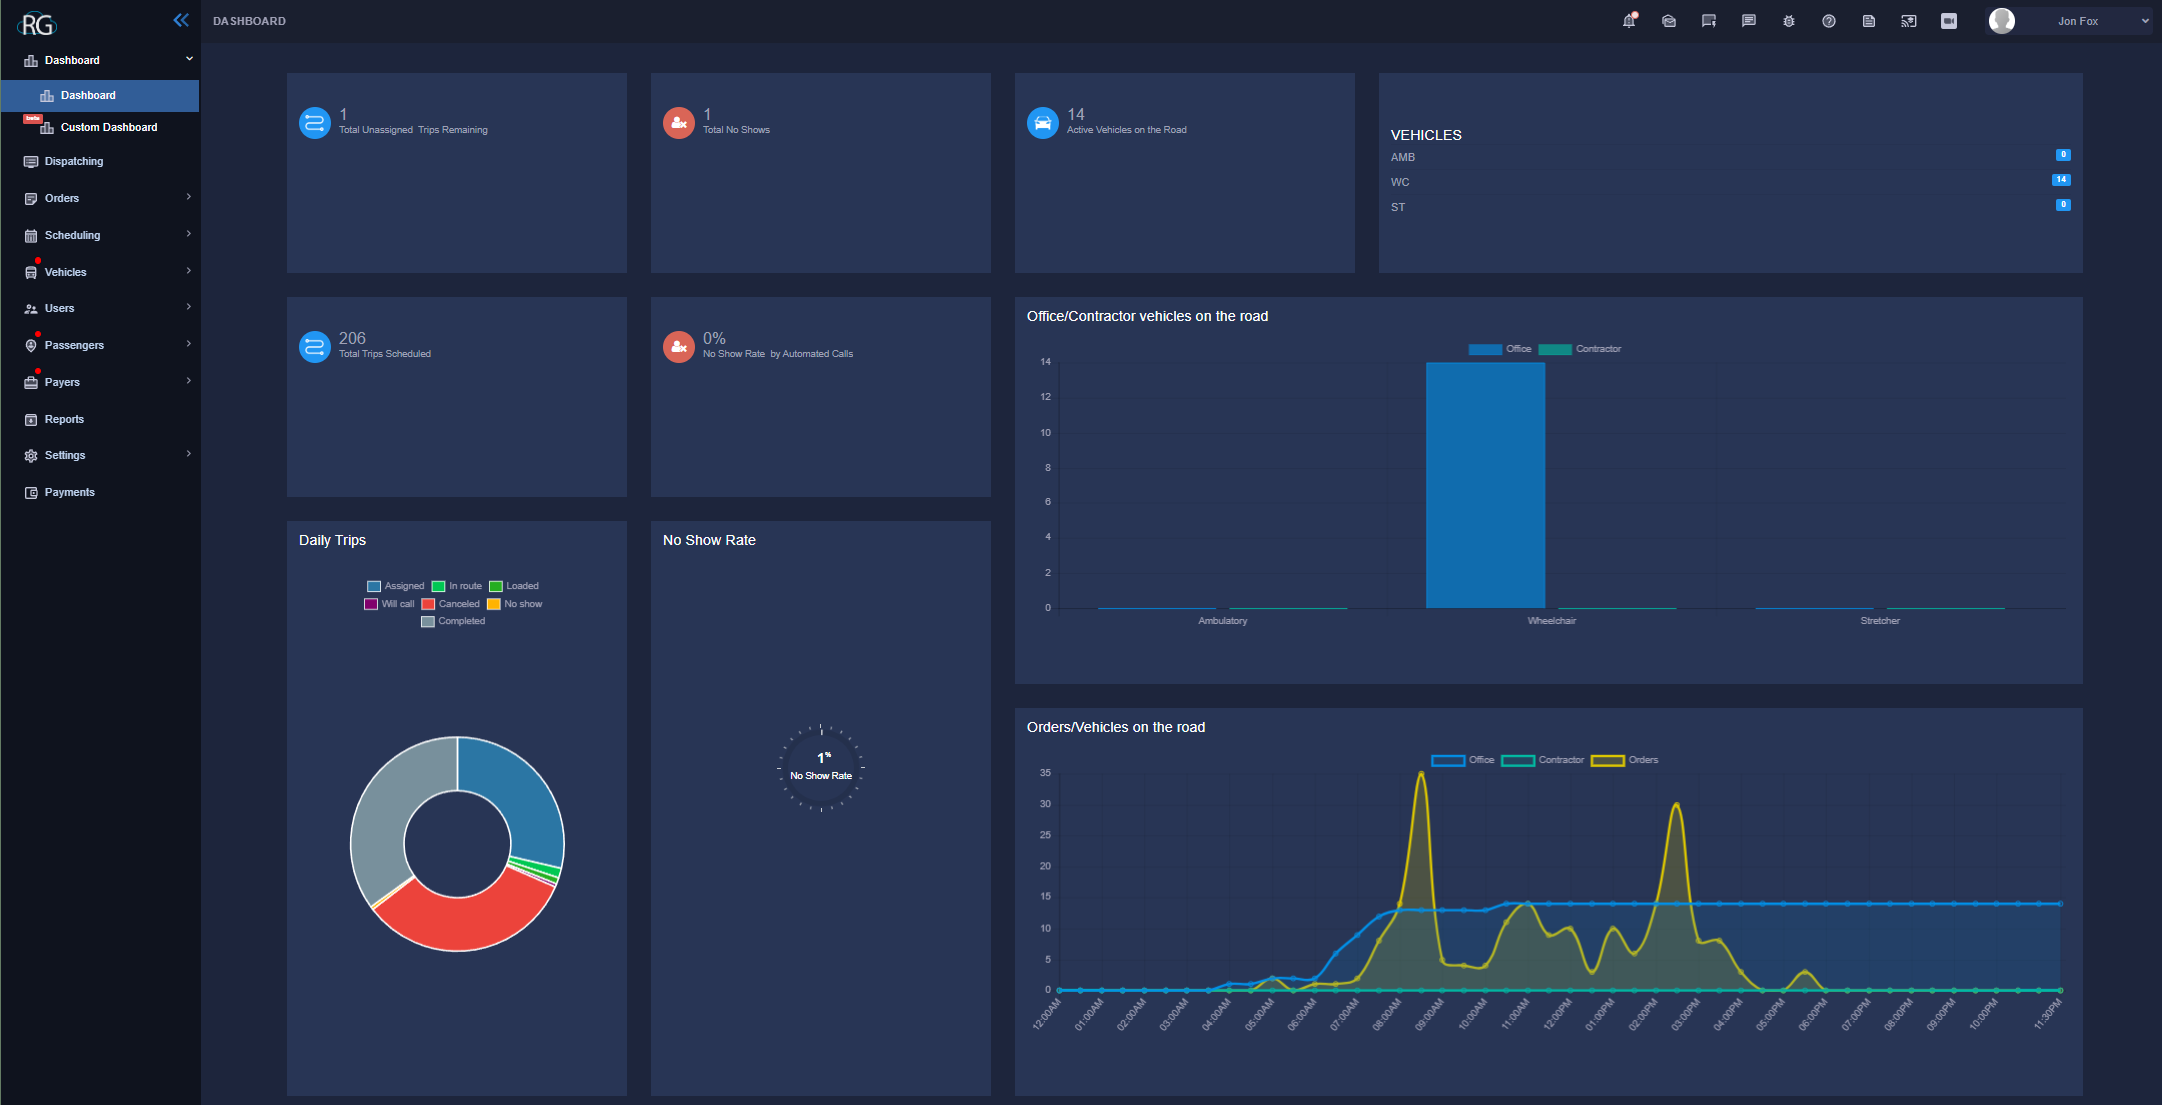
There is a lot going on here but lets work from left to right.
One of the first things you are going to notice is a navigation bar fixed on the left of the window with the "RG" logo at the top.
On the top right we also see a cluster of icons as well as a drop down menu for personal settings the options found up here house things like an inbox for systemwide messages, the notification tray, bug report, and other options of the like.
The focal point on display is what RG refers to as the Dashboard, there is both a pre-built dashboard and the ability to construct your own. The one featured when you open the website is the prebuilt one. To construct your own you must choose it from the drop down on the side, we will talk more about that later.
Navigation Bar
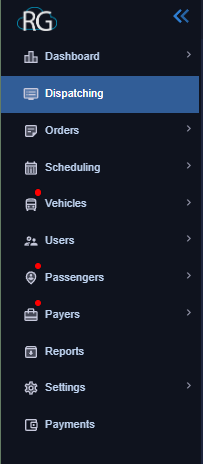
As you can see above the navigation bar is made up of multiple drop down menus, each leading to multiple options, clicking them will open the related interface.
Lets go over them from top to bottom, while we wont take a deep dive on these sections here (they will each have their own article) we will go over what they house and how to navigate them.
Dashboard
We already talked about the Dashboard section above a little bit. This is one of the few sections we will not go over in a separate article as it does not really require one.
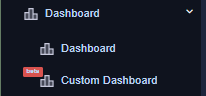
The Dashboard option is made up of a drop down menu consisting of two options.
They are both pretty similar. "Dashboard" is a premade Dashboard providing a window into our NEMT operation, it displays various statistics laid out in an easy to digest format.
"Custom Dashboard" is very similar, although upon opening it the dashboard will appear blank. To apply widgets to your dashboard click on the settings wheel in the top right, shown below:

This will open a menu of widgets that you can add to your custom Dashboard. Some will require you to select a date range before adding them and others will use the date range you select in the top left of the dashboard.
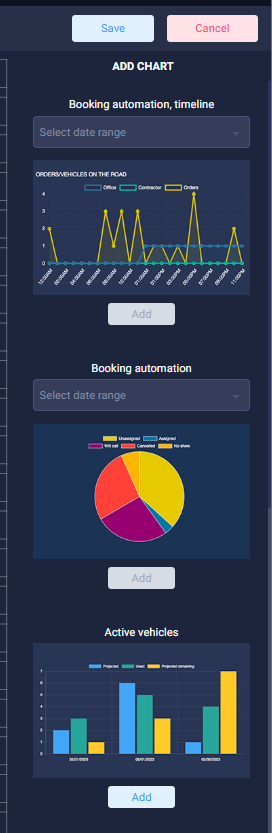
Remember you must also set a date range on the top left, if you dont then your widgets that require it will not pull any data as they need selected dates to pull data from.

Keep in mind that this feature is still in beta according to "RG" so it may not always function perfectly.
And that is really everything there is to know about this section, it is more or less just an information panel.
Dispatching
This is an extremely complex Dashboard that will have its own help guide.
A large portion of your time in RG will be spent in the Dispatching interface shown below:
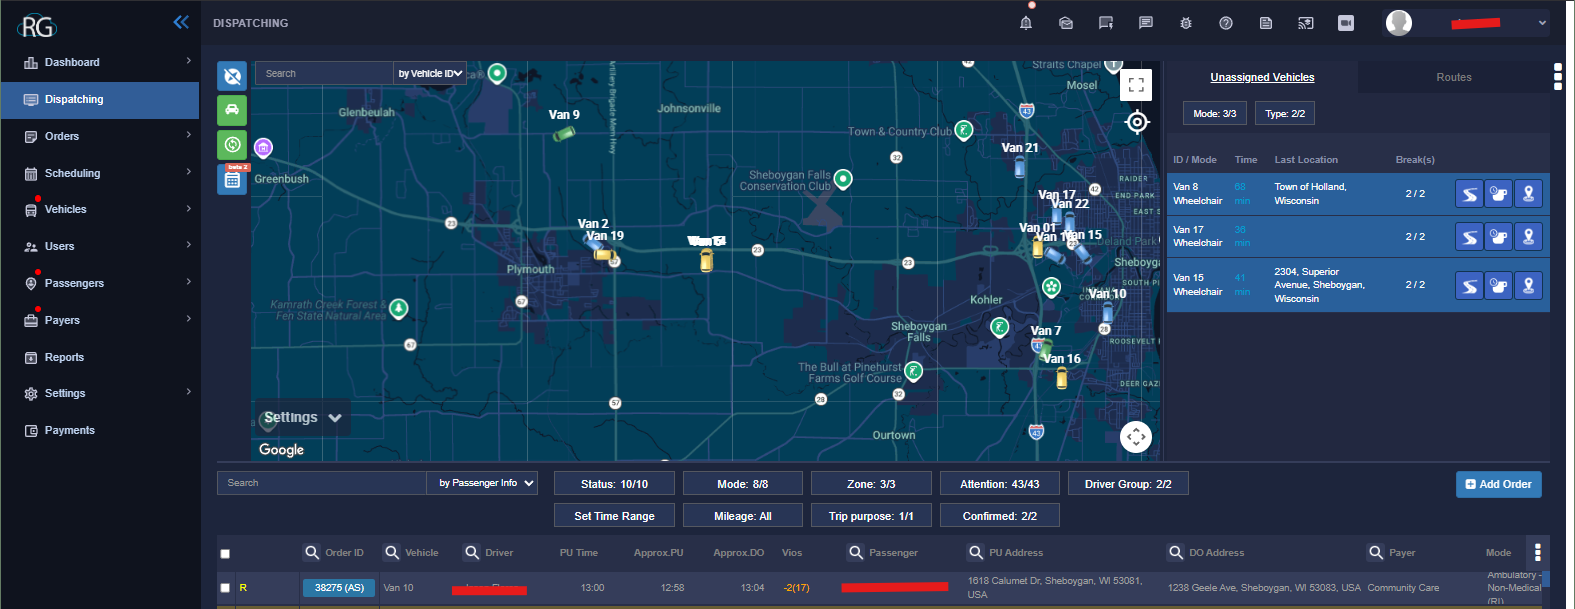
Unlike your the last section this interface is far too complex to cover in a few sentences. The Dispatching interface contains a log of all the trips for any given day, shift data for the drivers and vans as well as a plethora of tools to allow us to manipulate the schedule as we work through the current day.
Notably you can also add an order from the Dispatching interface.
Orders
Next up is the Orders drop down, shown below:
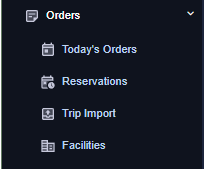
Here we have the option to look at a number of different interfaces.
Todays Orders
This interface displays a logbook specifically for just the current days orders.
Reservations
Similar to todays orders the reservations interface displays a searchable logbook of trips, only here it includes every trip we have in the system from the day the server was spun up to the current working day.
Trip Import
This interface provides a way to import tips in to the system via a spreadsheet, however, we do not currently utilize this in anyway at lakeshore. Not to say we never will use it but at least for now there is no need to worry about it.
Facilities
This interface provides an index of facilities that we have saved in the system, you can also add facilities to this index here. It allows us to quickly add in a location when scheduling a trip as you can just type the facility name instead of needing to know the address.
Scheduling
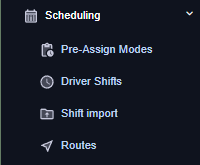
A Pre-Assign is basically a schedule for any given day, and we create them individually. Trips are entered in to the system as we get them and when a pre assign is created it pulls in any trips for that date.
Essentially each upcoming day has its own Pre Assign and that is finally displayed in dispatching once it becomes the current day.
Just like the Dispatching Interface the Pre Assign interface is pretty complicated, it is also somewhat similar although it does have key differences, for instance, re organizing routes is much easier in Pre-Assign mode. Here is a glance of what the Pre Assign interface looks like:
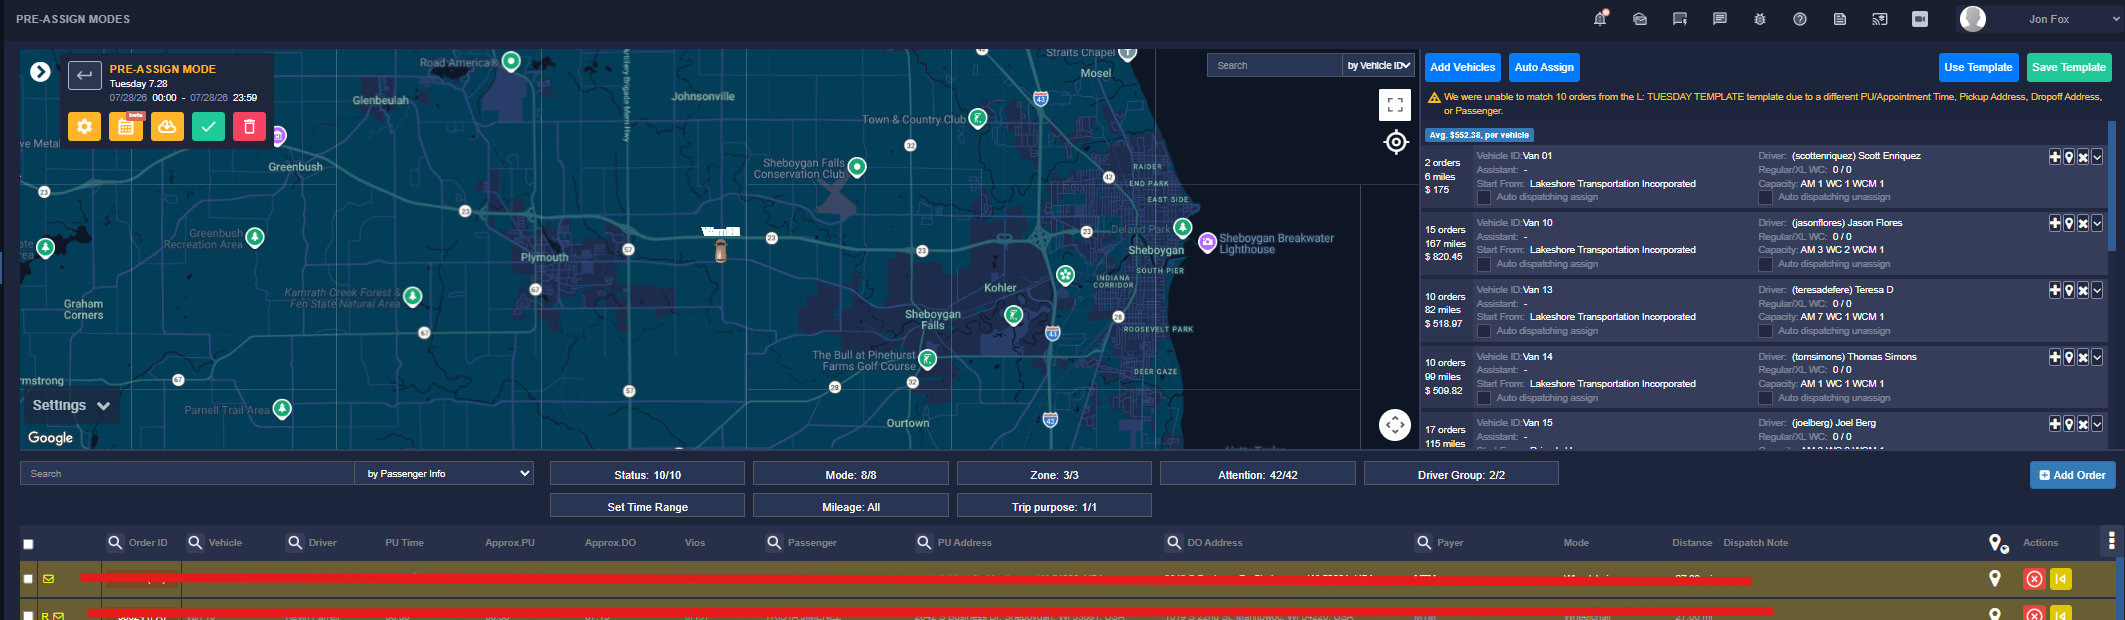
Also like dispatching we wont be deep diving into this here.
The Scheduling dropdown also houses a few other options but at lakeshore we only use one of them.
Driver Shifts
The only other interface we work with in the scheduling drop down at lakeshore. This interface can be used to display the driver schedules for any given day, you will often have to come in here to fix things like incorrect vehicles, shift swaps, and clearing duplicates.
Lets take a quick glance at what the Driver Shifts Interface looks like:
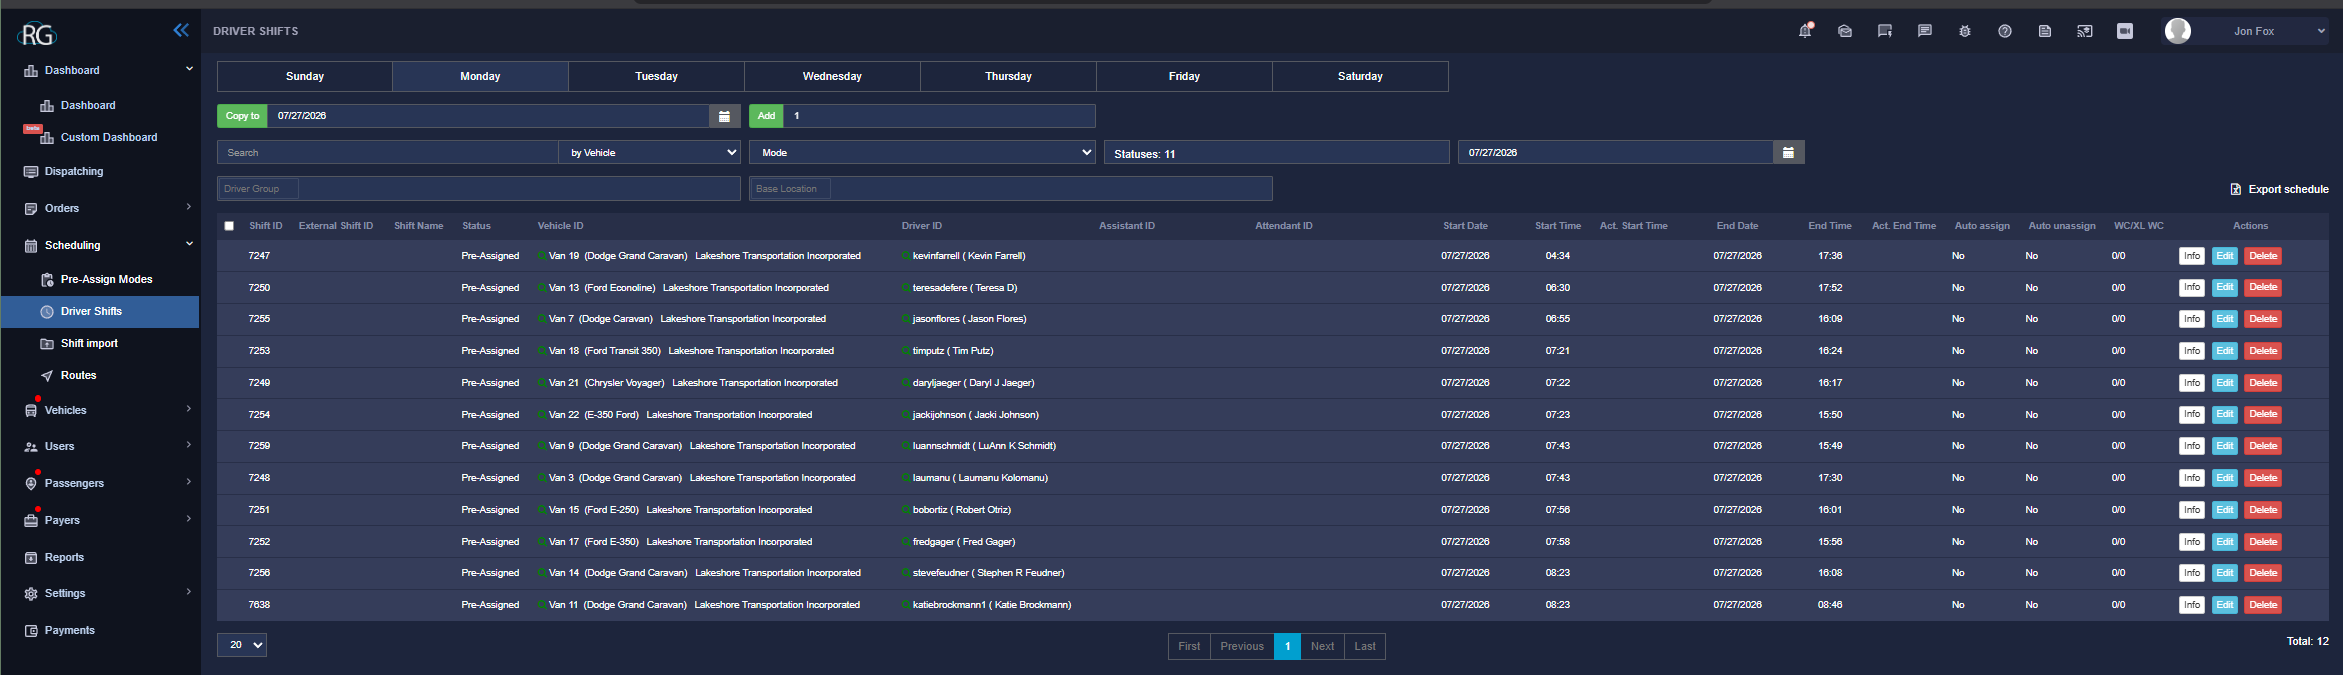
While we do not spend a lot of time messing around with this interface some of the more confusing tasks you will encounter do require understanding how this works and unfortunately understanding exactly how driver shifts work is part of the steep learning curve i was talking about earlier. It is not as straightforward as one would think.
Shift Import
This interface is for importing driver shifts via a spreadsheet, we dont currently make use of this at Lakeshore.
Routes
Scheduling routes is another way to assign trips ... it kind of works in the way you would think a bus route does. This is useful for companies that have the exact same trips and the exact same schedule every single day. Currently we do not utilize this at Lakeshore.
Vehicles
The Vehicles drop down is one of the more easy to understand menus in the RG system:
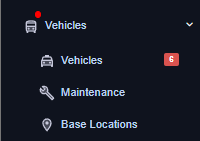
Vehicles
The Vehicles interface lists all the vehicles we have available along with their capacity and other amenities, you can also toggle a plethora of settings and view things like vehicle history in this interface.
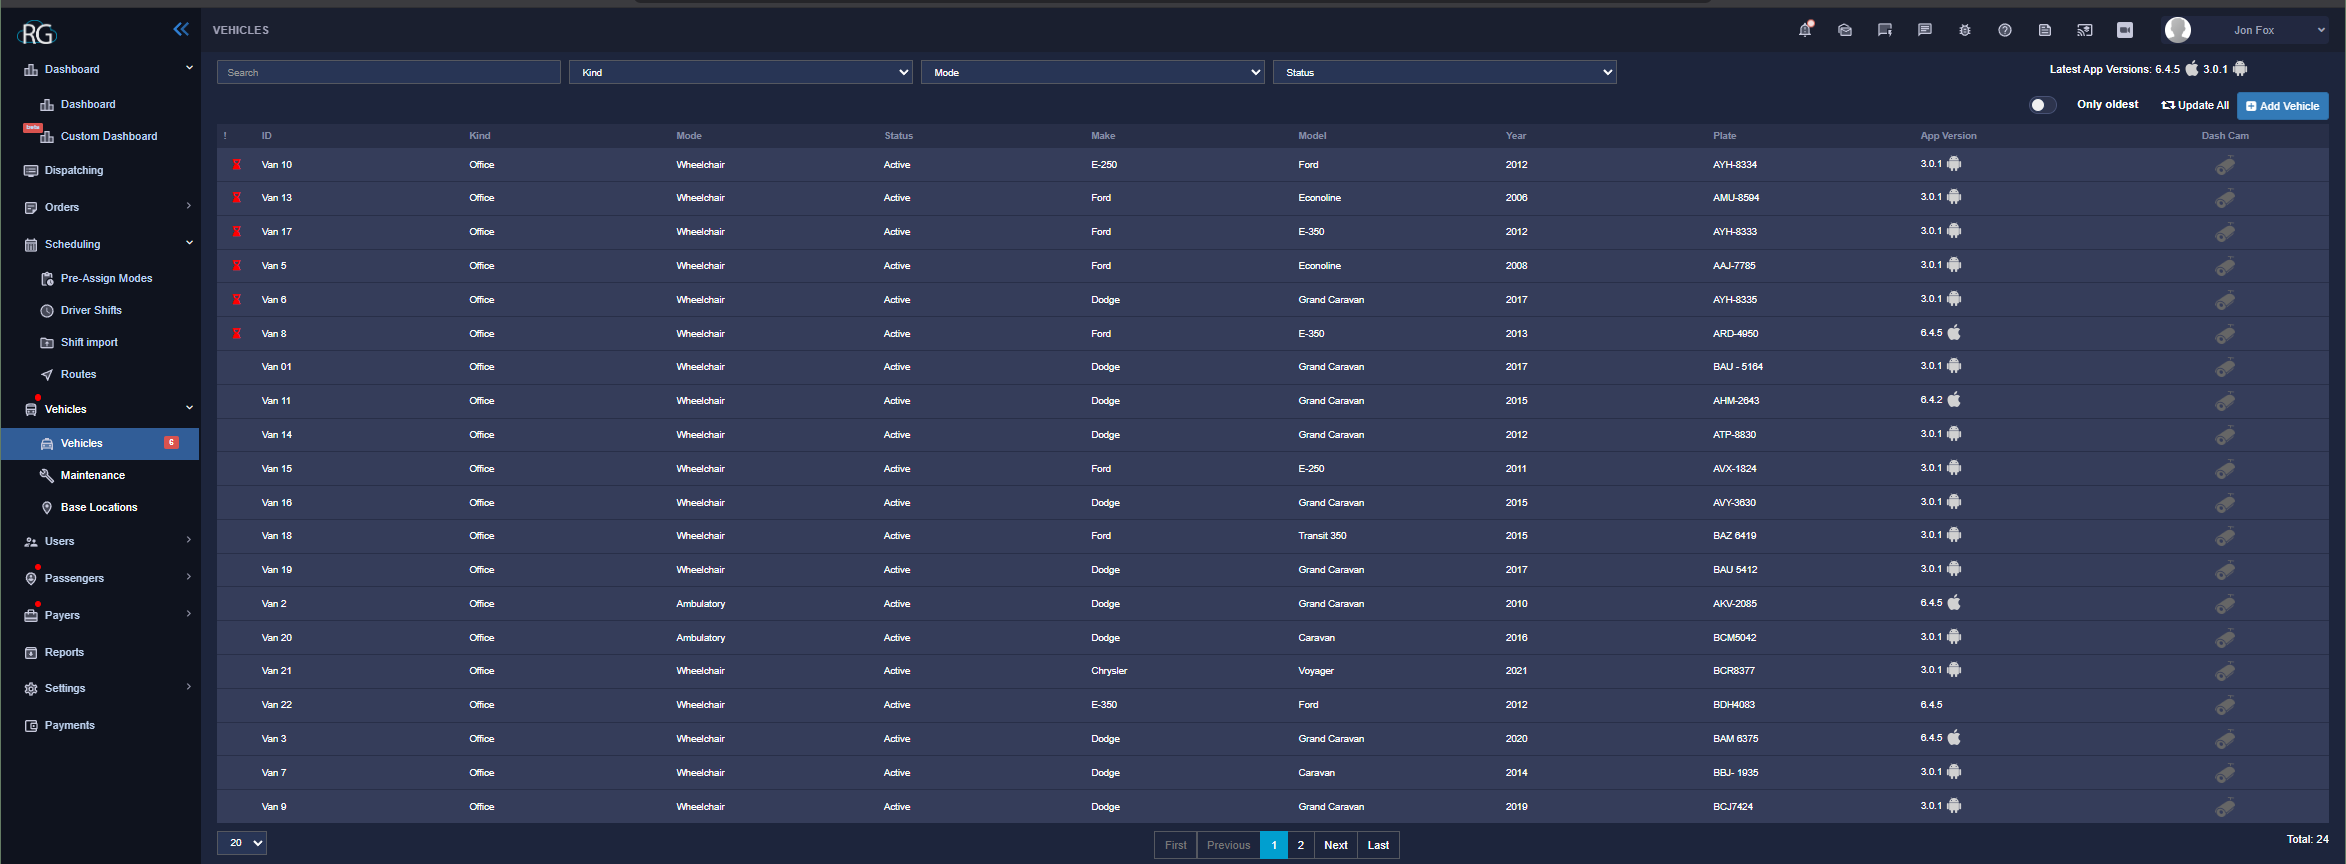
One of the really important things to keep in mind is that RG is billed based on vehicles, even adding a vehicle temporarily will result in an extra charge, so never add another vehicle on here unless you have been instructed to. Not even briefly as a learning tool.
Maintenance
This is a really useful interface that allows us to keep track of vehicle maintenance, it also helps to keep us from scheduling trips on vehicles that are currently in maintenance. However, we do not currently use this interface at Lakeshore although that may change in the future being as it is one of the few unused interfaces that we actually DO have use for.
Base Locations
While we do use this interface it is pretty simple. This allows you to list your base locations (duh) and the related information. Since we only have one its not something we really ever work with but we do technically use it as we do have the one listed. Maybe as our company grows this will become of more use to us.
Users
The users interface is all about us, the internal user.
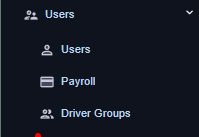
Users
On this interface we can find a log of all the current users and we can also add users as needed.
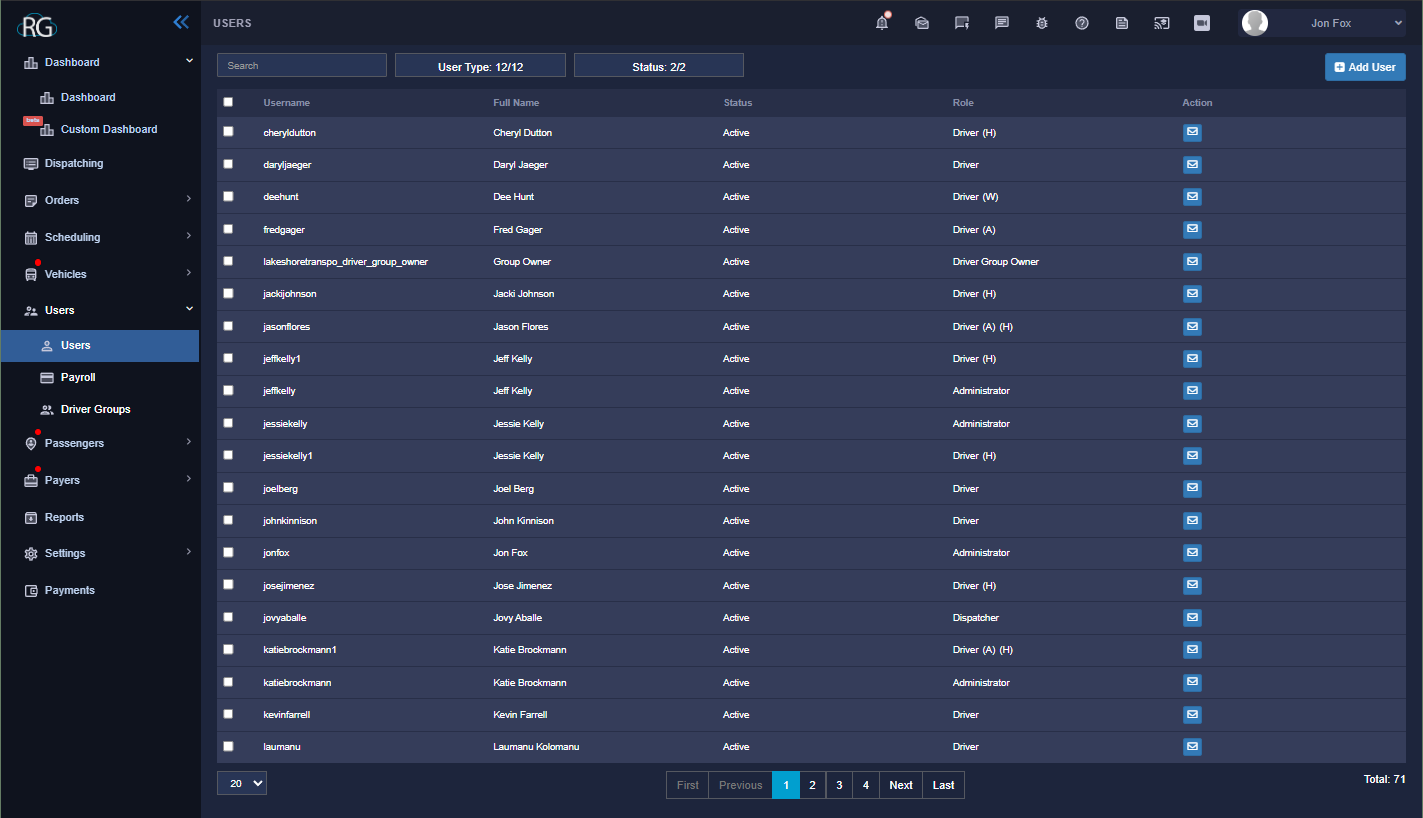
There really is not much more to it than that, you will also find various personal information as well as access settings for each individual user but your own level of access will also have an effect on what is available to you here.
Payroll
Another interface that we do not use at lakeshore, our payroll is handled through Quick Books.
Driver Groups
Driver Groups are strangely complex and while we do not really use them at lakeshore I suppose it is somewhat important to understand what they are exactly.
Simply put, it is what the name says.
In more complex terms the goal behind them is to group Drivers together for various reasons. You may have a certain group of drivers that must be used for a specific payer. Or maybe you would like to group your drivers geologically to a certain side of town. Whatever the reason Driver Groups allow you to manage your team in this way and provide a wealth of settings, logs and options to go along with it.
Again we do not currently use Driver Groups at lakeshore, but that is not to say we never will.
Passengers
This drop down is focused on cataloging our riders and their experiences.
Passengers
The interface for Passengers is not much different than the one for Users aside from the fact that it manages our customers and not our employ.
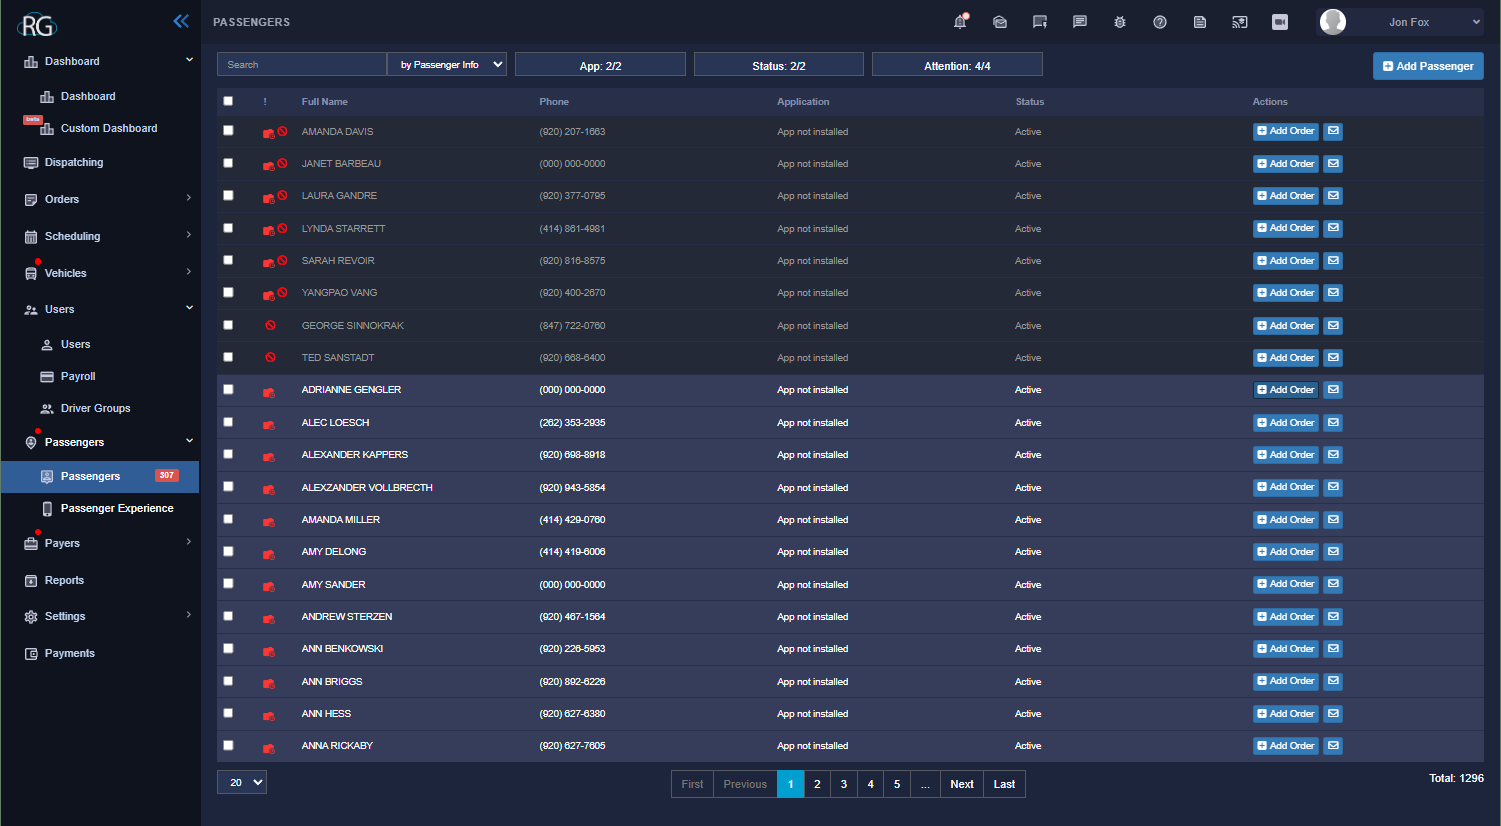
You can also add a passenger here if need be although that is rarely required as they can be automatically added in most circumstances by simply creating a trip for them and entering their information. Alternatively you can also add an order to a user directly here.
Selecting any given users profile opens up a large option of settings and logs that allows us to manage our passengers as we see fit, everything from changing a passengers address to blacklisting them from a driver can be done here.
Passenger Experience
This interface is to be used with an external app that allows passengers to review their experience, we do not currently utilize this at Lakeshore.
Payers
The Payers interface is similar again to the Users and Passengers interface except here we are referencing payer profiles.
Payers
Taking a look at the Payers interface is again reminiscent of Users, and Passengers. It is simply a log that houses all the Payers Lakeshore Transportation works with:
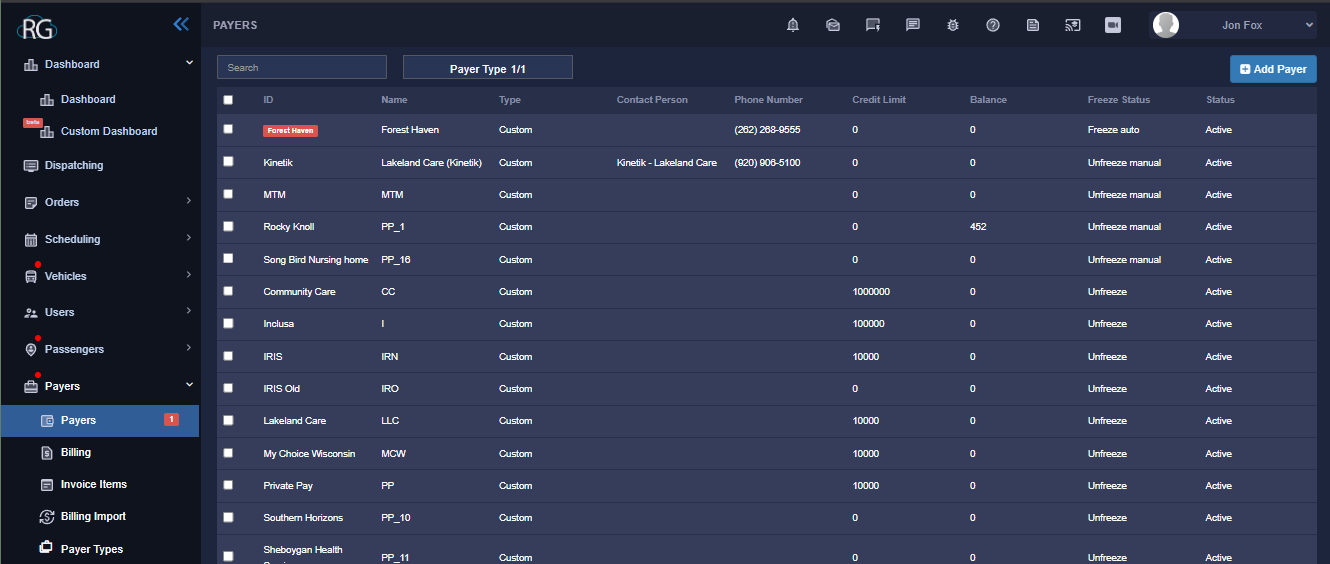
As with other similar interfaces (previously mentioned) selecting any given option from the list/log will open a profile for that payer with plenty of options and settings from A-Z. While it may seem simple at first there is a little more going on here than what is obviously apparent.
Payers can also be added here in a similar way to adding a user or passenger and creating a profile for them allows for a plethora of options and settings to use against each new addition. You can access these by simply choosing a payer form the list.
Billing
While we do currently utilize SOME of the options available through RG for billing we handle a large portion of it externally through QuickBooks along with our payroll.
Invoice Items
This interface provides us with a log for managing and tracking "Invoice Items", this is one of the billing features that we do use. Some examples of invoice items are things like "Wait Time" and "After Hours Surcharge". Invoice items are added in to the log here and the interface provides settings and tools to help manage them.
When being used they are added on a per trip basis when the trip is being created.
Billing Import
A tool for importing bills in to RG, it is not something we utilize here at lakeshore.
Payer Types
A way to group payers together using similarities, again, not something we use here at Lakeshore.
Reports
This option does not have a drop down menu, but that does not make it any less complex.
The reports interface is used for exactly what you would expect, generating reports. We give RG a WHOLE lot of information and it stores all that information in the apps databases on our (private) server. Because of this RG is capable of querying all that historical data and using it to generate reports. Need to know how many miles a specific driver drove this past week in comparison to their average? take a look at how many times we have been late to pick up a certain client? Compare what drivers do the most work? Revenue information? None of that is a problem, its all there and accessible and then some.
Obviously we will not take a deep dive into setting up reports here but stay tuned for a full walkthrough on how to generate reports using RGs Reports Interface.
Settings
Another option name that is more or less self explanatory, the settings drop down is grouped in to four options.
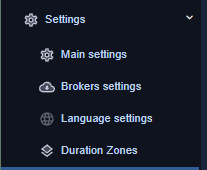
Main Settings
An exhaustive list of options, toggles and automations the main settings menu covers all the settings needed to operate the website, once opened they are grouped in to a list that is far too long to even screenshot but there is a lot covered from the most basic things like "General" to more complex things like "Driver Shifts" you will find everything you could think of to tweak/manage the website here.
Broker Settings
Similar to the main settings option but specifically related to Brokers. Inside the interface each broker has its own menu, this one we do not access nearly as much if at all but when needed you will find our brokers settings and options here. As of right now I believe this would only apply for MTM although that does not mean we wont have more broker integrations in the future.
Payments
Last but not least we have the Payments interface.
As important as this is, RG would not work if we stopped making payments, it is not something employees need to worry about. This is the interface lakeshore uses to pay for the RouteGenie SaaS on a monthly basis.
Top Right Button Cluster
As exhaustive as the navigation bar is, believe it or not, it isn't a complete list of options we have as users from the home page. Up on the top right of the website you will notice a cluster of buttons along with a drop down that displays your name/username.
Lets take a closer look:

While we do have a lot of options here this wont take nearly as long to go over as most of them are just simple QuickLinks.
Lets work from left to right.
Notification bell

Here is where all notifications will appear within RG. Simply clicking it will open up the notification tray. Everything from MTM trips and changes to standing order extensions to document downloads will appear in this tray.
Message Cluster

While we could spend a decent amount of time getting in to these we will not because we do not use them at lakeshore. These three Icons handle the internal messaging system that is built in to RG but we do not use it. We communicate via QUO and Slack.
Quick Link Cluster
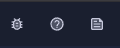
The next three are Quick Links which are all useful in their own right.
From left to right:
Bug Report
If you experience a bug or have an issue with RG you can report it here quickly. However, if it is something that is effecting operations currently you need to notify the rest of the team (us) and probably call RouteGenie help desk (the number is saved in Quo). This should be used for small issues that are not stopping anyone from doing their job.
RouteGenie Knowledge Base
While we want you to reference our own knowledgebase first as it is geared toward operations at lakeshore RG does have its own knowledgebase that you can also check out.
NEMT News
This is just a quick link to the RG blog ... some of the stuff in there is pretty interesting and they do keep it up to date but they also tend to email these articles to us pretty regularly as well.
Free Live Training

Realistically you should consult with our management team before trying to set up a training session with RG but this is another quick link that will put you in direct contact with the RG training team. This could be useful if your having a really hard time getting over the learning curve.
Screen Share

Personal Settings
Lastly we have our personal settings drop down.
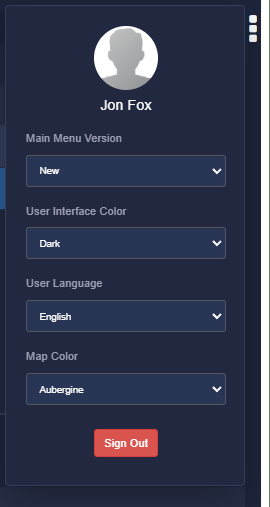
This drop down provides us with a few basic options that allow us to change things like the layout of the interface, Map Color, and Language. Alternatively if you need to manually sign out of your instance this is where you would do it.